

How To Export In Lightroom Cc 2018
After you have organized your photos in the Library Module and moved to the Develop Module to edit your images then you are ready to export your images. Now you are ready to use these Lightroom export settings.
Lightroom is different than other programs and saves your edits in the program itself. That is why when you exit out of Lightroom it will ask you if you want to back up the catalog. Always choose use as this keeps all your edits up to date incase something happens next time you open your Lightroom catalog.
However, this doesn't help you if you want to print or share one of your images on the web. In that case, you need to export your pictures from Lightroom. There are several different settings that you need to use depending on what you are going to use your photos for. For example, if you are exporting for Facebook then you will use different Lightroom export settings than if you were going to export high resolution images for print.
I recommend creating your editing workflow to include exporting your photos from Lightroom. This makes sure that the photos are always saved in the right place and are ready when you want to share or print them.
How to export photos from Lightroom
First you need to select the images you want to export from Lightroom. It's important that you tell Lightroom which of your photos you want to export so you need to select them.
How to select your images for export
If you have a group of images you want to export you need to:
1. Click on the first image
2. Hold down shift
3. Select the last image in that series
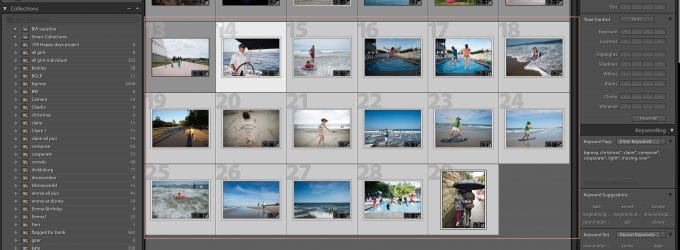
If your photos are not in a row next to each other and you want to a random selection of images you need to:
1. Click the first image
2. Hold down 'Command' on Mac or 'Control' on a PC
3. While holding down Command/Control select all the image you want to export
After you have selected the photos for export, you click on 'File' and scroll down to 'Export'.
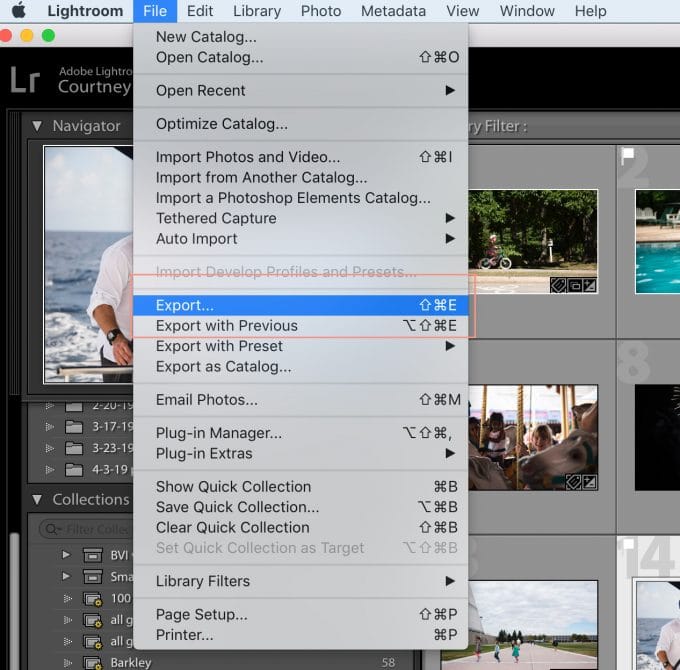
There is another option that says 'Export with previous' this option works well if you export your pictures and realize there were a couple more you wanted to export the same way. You can click this option and instead of the export settings window popping up, it will just use the same settings as last time and put your photos in the same as the previous export.
Where to put your photos when you export from Lightroom
When you export photos from lightroom you need to tell Lightroom where to put your images. You can put them on your computer or an external hard drive.
Personally, I like to keep all my images on my external hard drive so my pictures don't use up all my storage space.
In order to keep your photos as organized as possible, I recommend exporting your images back into the original folder. This means keeping your newly edited photos with your original files.
However, I recommend putting the edited pictures into their own folder within the original file folder so they are easier to find later.
I use two folder types. One for print & one for web. I dive into those settings and why I do that below.
How to export high resolution images from Lightroom
When you are exporting your images because your want to print them, which is extremely important and you definitely should print your photos, then you need to make sure you have the proper settings so that your pictures don't come back pixelated. This happens when the resolution is too low.
Instead when exporting images with a high resolution you need to make sure the pixels per inch is set at least at 300ppi. This makes sure that you can print the photo at any size and you will have a high quality photo.
Lightroom Export settings for print
When you export your high resolution images for print you want to put them in their own folder so you don't accidently print a photo that was intended for the web.
As I mentioned before, I like to put my print photos in the same folder as the original. However, I put them in a subfolder titled '1 print'. The reason I put a number one in front of the word print is to that folder pops to the top of the original folder. You can also use an @ sign.
1. Choose the location of where you want to export the photos. I put them in the original folder in a subfolder titled '1 print'
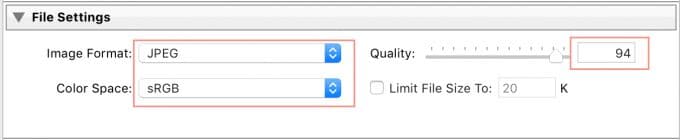
2. Choose the file type. I select JPEG & color space sRGB
3. Make sure 'Resize to fit' is NOT selected
4. Change the resolution to 300 pixels per inch (ppi) as this will give you a high resolution photo to send to your lab

5. Choose sharpen for 'glossy' or 'matte' depending on your print type

6. Do NOT select watermark as you don't want a watermark on your printed photos

7. Click Export
Lightroom Export Settings for web
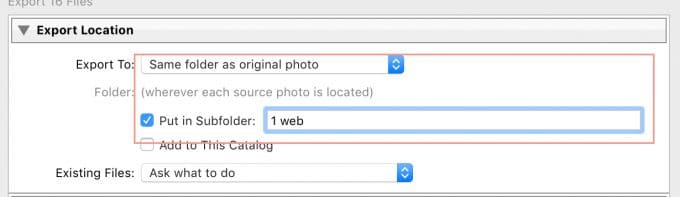
1. Choose the location of where you want to export the photos. I put them in the original folder in a subfolder titled '1 web'
2. Choose the file type. I select JPEG & color space sRGB
3. Make sure 'Resize to fit' is selected. Long edge 1600 pixels.
4. Change the resolution to 72 pixels per inch (ppi).

5. Choose sharpen for 'screen'

6. If you want to watermark your image in Lightroom you would do so here. Select 'Watermark' and choose the watermark you want to use.

7. Click Export
Best settings to use for Facebook photos
When you want to share your pictures on Facebook you need to size them for the web. We do this for several reasons but mainly to help them load faster as well as prevent someone from downloading a high resolution print size image.
As of 2019, Facebook recommends that your images is sized at 2048 pixels on the longest side.
Use the following image sizing when exporting from Lightroom for Facebook
1. Choose the location of where you want to export the photos. I put them in the original folder in a subfolder titled '1 web'
2. Choose the file type. I select JPEG & color space sRGB
3. Make sure 'Resize to fit' is selected. Choose long edge and type in 2048 for pixel size.
4. Change the resolution to 72 pixels per inch (ppi)

5. Choose sharpen for 'screen'
6. If you want to watermark your image in Lightroom you would do so here. Select 'Watermark' and choose the watermark you want to use.
7. Click Export
How to save your DSLR photos for Instagram
1. Choose the location of where you want to export the photos. I put them in the original folder in a subfolder titled '1 web'

2. Choose the file type. I select JPEG & color space sRGB

3. Make sure 'Resize to fit' is selected. Choose long edge and type in 1000 for pixel size.
4. Change the resolution to 72 pixels per inch (ppi)

5. Choose sharpen for 'screen'
6. If you want to watermark your image you would do so here. Select 'Watermark' and choose the watermark you want to use.
7. Click Export
If you are wondering how to get DSLR pictures from your computer onto Instagram, it's quite simple.
You can do one of two things.
- Email the photo to yourself & open on you phone. Then save image to your phone. Next, open the Instagram app and upload it
- Save the photo in your Dropbox. Open the Dropbox app on your phone, save the pictures, and upload to Instagram
How To Export In Lightroom Cc 2018
Source: https://clickitupanotch.com/exporting-photos-from-lightroom/
Posted by: biermannoccowell.blogspot.com
0 Response to "How To Export In Lightroom Cc 2018"
Post a Comment